
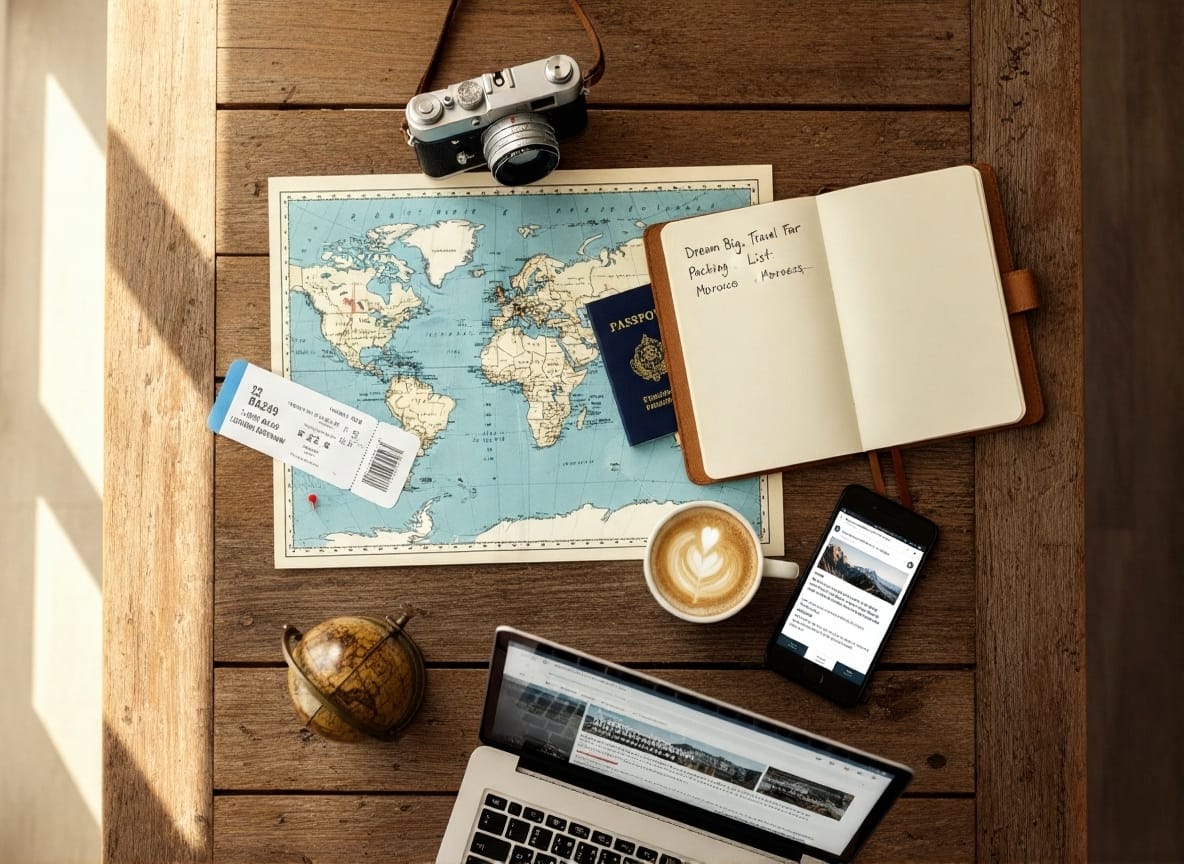
Travel blogging is a dream for many wanderlust souls, and if you’re wondering how to start a travel blog, you’ve come to the right place. A travel blog is essentially a website dedicated to sharing travel experiences, tips, and stories. It can allow you to fund your adventures and inspire others while you explore. However, as any veteran blogger will tell you, it’s not as easy as it looks. Running a travel blog requires hard work and perseverance. For example, Nomadic Matt – a successful travel blogger – emphasizes that a travel blog “is not as easy as it looks from the outside” and demands consistency. In 2025, experts also note that setting up a blog is easier than ever, but attracting real readers via SEO has become challenging With search engines evolving, new travel bloggers must focus on creating valuable content.
Travel blogging looks glamorous, but it’s a business too – one that takes passion, planning, and persistence to succeed. In this friendly guide, we’ll walk you through every step of starting a travel blog: from picking a niche and memorable name, to setting up hosting and WordPress, to writing great posts, optimizing for search engines, and even earning income along the way. Let’s dive in and help you turn your travel dreams into a reality!
Why Start a Travel Blog?
Before jumping into the technical steps, it’s worth asking: why start a travel blog? There are many great reasons, plus a few realities to keep in mind:
- Share Your Adventures: A travel blog lets you document journeys and share your stories with friends, family, and the world. It’s a creative way to preserve memories and give your travels purpose.
- Inspire and Help Others: Travel blogs play an important role in travel planning. They offer genuine, up-to-date information and tips that fellow travelers crave. As one blogger notes, travel blogs now focus on providing quality, in-depth info so others can have the same experiences. Your unique perspective can inspire readers and help them plan their trips.
- Build a Brand or Portfolio: Over time, a travel blog becomes your online portfolio. It can showcase your writing, photography, or video skills, and even become a personal brand in the travel space.
- The Travel Lifestyle: Many people dream of the freedom travel blogging promises. As one guide points out, people see travel blogging as “the ideal lifestyle… offering a world of opportunities and, most of all, freedom”. While reality involves work, it can be a rewarding way to blend work and wanderlust.
- Monetization Potential: Yes, a travel blog can earn money eventually. Common income streams include affiliate links, advertising, sponsored posts, or selling your own guides. For instance, affiliate marketing (promoting travel insurance, tours, or gear) is often cited as one of the best ways to monetize a blog. Some travel bloggers even publish e-books or courses – Nomadic Matt famously made $50–60K/year from e-book sales early on. Keep in mind: turning a blog into a lucrative business “will require a lot of time, hard work, and perseverance”. Don’t start blogging just to get rich; start because you love travel and storytelling.
- Skill Development and Community: Running a blog helps you develop skills in writing, photography, web design, and marketing. It also connects you with a community of like-minded travelers and fellow bloggers.
You may also like: 10 Travel Photography Tips for Beginners, Budget Travel Hacks: 15 Ways to Save.
Ultimately, if you have a passion for travel and writing, a travel blog can be a fun way to share that with the world. Just remember that (as travel experts warn) it’s a journey of its own, not an instant success. Now, let’s get into how to start a travel blog step by step.
How to Start a Travel Blog: Step-by-Step Guide
Starting a travel blog involves a series of clear steps: defining your focus, registering a domain, setting up hosting and WordPress, designing your site, creating content, promoting it, and eventually monetizing it. Below we break down each stage:
Step 1: Pick a Memorable Blog Name & Define Your Niche
Your blog’s name is your brand, so choose it carefully (but don’t panic – you can always rebrand later if needed). Think of something short, catchy, and relevant to your niche. Travel blogger ExpertVagabond advises choosing a name that is “easy to type, spell, and remember”. You don’t even have to include the word “travel” in it if another concept defines you better. Nomadic Matt suggests being very niche-focused – whether it’s backpacking, RV road trips, vegan travel, or a specific country. For example, if you love hiking, your blog name could hint at mountains or trails.
- Make it Memorable: Keep it simple. Avoid long phrases or hard-to-spell words.
- Reflect Your Brand: Pick something that resonates with your style or topic. A name like “BeachBound” or “CityWanderer” can hint at what you do.
- Check Availability: Once you have a name in mind, check that the domain name is available. If it’s free, grab it quickly (popular domains can disappear fast). This name should also be available on social media platforms. One travel blogger recommends registering your chosen name on all major socials right away, even if you don’t plan to use them immediately – it secures your brand identity.
- Social Media Handles: Create matching social profiles (Instagram, Facebook, Pinterest, etc.) so your brand is consistent. For example, WeseekTravel advises locking down your social media accounts as soon as you pick a name.
By the end of this step, you should have a clear niche (e.g. “adventure travel” or “family trips to Japan”) and a memorable blog name that reflects it.
Step 2: Register Your Domain Name
A domain name is your blog’s web address (like www.MyTravelBlog.com). It’s what people type to reach your site. To create one, use a domain registrar (services like Namecheap, GoDaddy, or Google Domains). Here’s what to do:
- Choose a Short, Relevant Domain: Ideally use a .com extension, since it’s the most recognized. Your domain should match your blog name (e.g. “MyTravelBlog.com”). If .com isn’t available, consider a close alternative but avoid obscure endings at first.
- Check Prices: Domains usually cost only about $7–$15 per year. For instance, one travel blogger notes that a domain is “fairly affordable, usually about $7–$15 per year”.
- Register It Quickly: As soon as you confirm availability, register the domain. You can use Namecheap (as recommended by some bloggers for its low prices) or any registrar you prefer. When registering, you might also add WHOIS privacy (often included free) to hide your personal info.
- Glue it to Socials: Make sure the name on your social profiles matches your domain (e.g. if your domain is “MyTravelBlog.com,” use @MyTravelBlog on Instagram).
With this done, you now own your web address and brand identity. The next step is to set up hosting so your site can go live.
Step 3: Choose a Hosting Service
Your hosting provider is like renting the online space where your blog lives. A web hosting service stores your site’s files and makes them accessible to visitors. Here’s what to consider:
- Decide on a Hosting Type: Beginners often start with shared hosting or managed WordPress hosting. Shared hosting (cheaper, e.g. $3–$10/month) means your blog shares a server with others. Managed WordPress hosting (a bit pricier, often $5+/month) is tailored for WordPress sites and handles technical tasks (updates, security) for you.
- Recommendations: Many travel bloggers recommend managed WordPress hosts for simplicity. For example, one 2025 travel blog guide suggests SiteGround (a popular managed host, about $4.99/month) for new bloggers, or BigScoots if you want a more robust plan. These companies offer one-click WordPress installs, automatic backups, and strong support.
- Performance and Support: Look for good uptime (99.9%), fast servers, and 24/7 support. Read reviews. Some hosts offer beginner perks like a free domain for the first year.
- Pay Attention to Growth: If you expect quick growth or high traffic, consider starting with a plan that can be upgraded easily (VPS or cloud hosting later on). But for most new travel blogs, a basic plan suffices at first.
Once you sign up for hosting, you’ll need to link your domain to it (usually by changing DNS nameservers, as per your host’s instructions). Managed hosts often provide guidance or do this step for you.
Step 4: Install WordPress
After hosting is ready and connected to your domain, it’s time to set up your blog software. WordPress is by far the most popular choice (it powers over 43.6% of all websites on the Internetkinsta.com) and is ideal for blogs. Here’s what to do:
- One-Click Install: Most hosts have a one-click installer for WordPress in the control panel. Use it! It installs the WordPress software onto your hosting server. (As Wikipedia notes, WordPress simply needs to be installed on a web server to function.)
- Manual Install (if needed): If no one-click option exists, you can download WordPress from wordpress.org and follow the manual setup instructions (most hosts have tutorials for this).
- Log In to WordPress: Once installed, go to
www.YourDomain.com/wp-admin(e.g. yourblog.com/wp-admin) and log in with the credentials you set. You should see the WordPress dashboard, which is your blog’s control panel. - Verify Your Site: Visit your domain in a browser. You should see a default WordPress page or a basic theme. Congratulations – your blog is now live on the internet, albeit in a raw form.
WordPress is free, open-source, and user-friendly. Even someone with no coding background can pick it up. By installing it, you’ve set the foundation for your travel blog.
Step 5: Pick a Theme and Essential Plugins
Now for the fun part: making your site look good and function well. In WordPress, the theme controls design and layout, while plugins add features.
- Choose a Theme: Go to Appearance > Themes in your dashboard and browse. Look for a modern, responsive theme optimized for blogs. Many travel bloggers start with popular themes like Kadence (free) or premium themes like GeneratePress or Trellis. High-quality themes ensure your blog looks professional on any device. One experienced blogger warns that cheap/free themes can cause problems later, so consider investing (paid themes range $40–$250). If budget is tight, Kadence is a great free option that yields a fast, clean layout.
- Customize Your Theme: After activating a theme, go to Appearance > Customize to change colors, fonts, and upload your logo. Keep the design simple and let your content shine.
- Install Essential Plugins: Plugins are powerful add-ons. At minimum, consider:
- SEO Plugin: Install an SEO plugin like Rank Math SEO or Yoast SEO. In fact, experienced travel bloggers often use Rank Math to optimize their posts. These help you set titles, meta descriptions, and assess keyword usage.
- Security & Backup: Plugins like Wordfence (security) and UpdraftPlus (backups) keep your site safe.
- Caching/Performance: A caching plugin (WP Rocket, W3 Total Cache, or LiteSpeed Cache) speeds up your site so pages load quickly.
- Social Sharing: Let readers share your posts by adding a social share plugin.
- Image Optimization: A plugin like Smush or ShortPixel can compress photos for faster loading.
- Set Your Permalinks: Go to Settings > Permalinks and choose “Post name.” This makes your URLs clean (e.g.
yourblog.com/how-to-pack-light), which is good for SEO.
With a theme and plugins in place, your travel blog will look attractive and be optimized for performance and search engines.
Step 6: Start Writing Your First Posts
Content is king on a blog, and travel blogs shine on storytelling. Now that your site is ready, it’s time to fill it with engaging posts:
- Brainstorm Topics: Think about what your audience would love. You might start with travel tips, destination guides, packing lists, or personal trip stories. If you chose a niche, focus on that (e.g. “5 Romantic Spots in Paris” for a couples travel blog, or “How to Backpack on a Budget in Thailand” for budget travel).
- Write Genuine, Helpful Content: One travel blogging pro advises to “begin writing about your own travel experiences and prioritize writing real, helpful, human-first blog posts”. That means write as if you’re talking to a friend: be authentic and give practical value. Use first-person anecdotes, but keep them relevant to the reader’s needs.
- Use Lots of Photos: High-quality photos make travel blogs irresistible. Include vibrant images (at least one per blog post). Optimize them (compressed and with descriptive alt text) for page speed and SEO.
- Format for Readability: Break your post into short paragraphs (3–4 lines each), use subheadings, bullet points, and numbered lists to structure the content. This keeps readers engaged. For example, use H3/H4 headings within posts for key sections.
- SEO Basics: Naturally include your keyword phrase (and variations) in the title, headings, and throughout the post. But don’t keyword-stuff – write naturally. Fill out the SEO title and meta description fields (via your SEO plugin), making them compelling for search results. An example: if you write “How I Planned My First Backpacking Trip,” your slug could be
planning-backpacking-tripand your meta description might hint at the tips inside. - Internal Linking: As you add posts, link to your other relevant posts within the content. For example, if you write a new post on Paris, you can link to an older post on “Best Cafés in Europe.” This keeps readers on your site longer and helps SEO.
- Publish and Preview: Before making a post public, preview it and check for typos, broken links, or formatting issues. When satisfied, hit Publish.
Remember: quality is more important than quantity at first. You might launch with 3–5 good posts, then stick to a regular schedule (e.g. one new post per week). Consistency and authenticity go a long way.
Step 7: Promote Your Blog (SEO & Social Media)
Now that you have a basic site and content, let people know it exists! Promotion is key to growing readers:
- Focus on SEO (Search Engine Optimization): Travel blogs typically get a lot of traffic from Google and Pinterest. Make sure each post is optimized: use relevant keywords in titles and headings, write clear meta descriptions, and fill out alt tags on images. Use your SEO plugin’s guidance. However, note that new blogs often face stiff competition in search results. As one blogger warns, attracting readers via traditional SEO has become more difficult due to constantly changing algorithms and AI. That’s why the emphasis on helpful content (E-E-A-T) is crucial: Google rewards trustworthy, expert content. So don’t obsess over tricks – write complete, valuable articles and Google will eventually rank them.
- Leverage Social Media: Social channels can drive traffic. Travel blogs often do best with Pinterest and Facebook. In fact, a travel blogger notes that “Pinterest isn’t really a social platform – it’s a visual search engine” and can be very effective. Create eye-catching Pins for your posts and join travel-related boards. Also share on Facebook and Instagram to tell your network. (Note: While Instagram/TikTok are fun, many bloggers find they don’t send as much traffic back to the blog. Still, use them to build your brand and funnel readers to your site.)
- Guest Posts & Community: Write guest articles on other travel blogs or contribute to travel forums (like Lonely Planet’s Thorn Tree). Engage with the travel community on Twitter or travel groups. This can earn you backlinks and readers.
- Email List: Start an email list (Mailchimp, ConvertKit, etc.) and invite readers to subscribe. Email is one of the best ways to retain an audience, as you own your mailing list.
- Analytics: Set up Google Analytics (or a privacy-friendly alternative) to track your visitors. See which posts get the most hits and where they came from, then double down on what works.
By combining SEO best practices with active social sharing, you’ll gradually grow your audience. Always keep the reader in mind: think about what questions they have and answer them thoroughly.
Step 8: Monetize Your Blog (Optional)
Once you have consistent traffic, you can start thinking about making money. Here are common monetization strategies:
- Affiliate Marketing: This involves promoting products or services and earning a commission on sales. Many travel blogs link to booking sites, gear shops, or travel insurance. For example, the guide above lists affiliate partners like SafetyWing and Booking.com. As mentioned, affiliate marketing “doesn’t require a ton of traffic to make some money” for your first earnings. Just disclose your affiliate relationships per guidelines.
- Advertising: Google AdSense or managed ad networks (like Mediavine, once you meet their traffic requirements) can display ads on your site. This provides passive income based on views/clicks.
- Sponsored Posts: Once established, travel companies or tourism boards may pay you to feature their services. A word of caution: avoid too many of these early on. Authenticity is key for travel readers.
- Products & Services: Many bloggers eventually sell their own products – eBooks (guidebooks, recipe books, etc.), online courses (e.g. photography or blogging courses), or even travel planning services. As an example, Nomadic Matt’s e-books became a big revenue source for him. Offering something unique can diversify income.
- Memberships/Patreon: You can create premium content for members or ask fans to support you on platforms like Patreon.
Even if you don’t plan to make money right away, it’s good to keep these avenues in mind. However, the priority in your first year should be growing content and readership. Monetization will be more rewarding when you have a loyal audience.
Travel blogging can fund incredible adventures – some bloggers literally live and work on the road. For example, this image shows a travel blogger writing from a campervan in Tasmania. By following the steps above, you might one day fund a nomadic lifestyle like this. Keep in mind, though, that success takes time: as one expert notes, it often takes at least a year of consistent effort before significant returns appear.
Final Tips and Next Steps
You’re now equipped with the roadmap to start a travel blog. To recap: choose a clear niche and catchy name, register your domain, set up hosting and WordPress, pick a good theme, and begin writing helpful travel content. Promote your posts with a smart SEO and social strategy, and consider monetization later on.
- Be Patient & Persistent: Building an audience doesn’t happen overnight. Travelblogging101 reminds us that blogging success “will require a lot of time, hard work, and perseverance”. Many new bloggers quit within a year, so if you’re serious, commit for the long haul.
- Focus on Readers: Always write for your audience first – be helpful, authentic, and inspiring. According to travel pros, engaging storytelling and genuine advice are what make a travel blog stand out.
- Continuously Learn: The web is always changing. Keep reading up on SEO trends, new travel apps, and emerging social platforms. Adapt as you go.
- Enjoy the Journey: Remember why you started. Every blog post you write is part of your travel journey. Enjoy sharing it!
Imagine your future blogging from a beautiful spot like this tropical beach. With the right steps – clear planning, a quality blog setup, and authentic content – you can turn that vision into a reality. How to start a travel blog? By following this guide. Now it’s your turn!
You may also like: Essential Travel Blogging Tools, Packing List for a 2-Week Trip, Top 10 Travel Safety Tips.
Ready to pack your bags and start your travel blogging journey? Visit PKTags. for more tips, guides, and inspiration. Happy travels – and happy blogging!